Friday 19 November 2010

Narrative and characters

There are 5 narrative stages in stories, books and movies.
  1. equilibrium
  2. disruption
  3. complication
  4. resolution
  5. new equilibrium
Showing the 5 stages in 'Jaws'


  1. equilibrium = everyone is happy at the beach
  2. disruption = a dead body is found
  3. complication = Sharks in waters. Closing or keep beach open? Will more people die?
  4. resolution = beach is kept open, they go out on the sea to catch shark!
  5. new equilibrium = shark is killed - everything is back to normal but things are not exactely as before the shark appeared, things changed and people died, therefore -> NEW equilibrium


Character theory by Propp  
Propp claims there are always certain characters in each story, movie or book. Which are...
  • the hero
  • the villain - causing disequilibrium
  • the helper - person who helps hero on their quest
  • the victim - at mercy of villain
  • the doner - he has something special to help hero


Example of 'Harry Potter And The Prisoner Of Azkaban'
  • Harry
  • Voldemort
  • Ron and Hermione
  • Sirius Black
  • Dumbledore

Horror Movie Conventions - Opening of' 'Scream'

Conventions in a movie are certain film components that regularly occur related to a genre. It's also something that the audience will expect to happen or to see on screen, in this case when watching a Horror movie. Usual conventions are:
  • blood, death, murder, violence
  • hero\villain, protagonist\antagonist
  • darkness
  • forest
  • quite suburbs
  • old, big, abandoned house
  • basement, attic
  • weapons, chainsaw, knife
  • ghosts
  • dolls, clowns
  • freaky children
  • car break downs
  • blonde sexy women are victims
  • characters introduced in beginning will die
  • the most quite and unobstrusive character is bad guy
  • electrical power outage
  • silence
  • isolation
  • hiding
  • kidnapping
  • sounds: panting, slow scary music, telephone ringing(and no one's there)

Looking at the opening sequence of the cult horror 'Scream' with Drew Berrymore, the following conventions from the above are represented:


  • night time
  • character playing with knife
  • big house (more places to hide) in the middle of nowhere
  • blonde yound pretty woman alone at home
  • locking the doors -> danger impending
  • telephone ringing
  • shut curtains waving in breeze
sounds that create fear and suspense:
  • dogs barking
  • sounds of squeking swing in the garden
  • breeze outside
Shot choices: tracking, canted, zooming in to close-up + reaction shot

Characters:
  • dumb, innocent, pretty blonde that is going to die

Thursday 18 November 2010

Denotation\Conotation of Thriller Images

Denotation: the literal analysis of a picture, by saying what you see in the picture without giving opinion.

Conotation: is where you give your opinion and give your interpretation of the image.


Denotation: Person in white mask, black cloak/cape holding a knife looking through window at a blond woman on a phone.
Connotation: Knife symbolises danger, woman may be on phone to police, Mask covers his identity. Perhaps a murderer breaking into the womans home. Mask hides idnetity therefore creating fear of the unknown.

Still from Pyscho
Denotation
Lady in shower, wet due to water. Open mouthed. Black and white still.
Connotation
May be being shocked in shower, screaming naked highlights her vulnerability and how she has no protection. Scared look on her face. Black and white still symbolises old movie.

Still from Gothika
Denotation
Woman in tracksuit in front of wall with red writing on it. Reading 'Not Alone'.
Connotation
'Not Alone'symbolises how she may not actuallyp hysically be alone or mentally. Highlighting mental problems or to contradict that she isnt the only person in the still. Her tracksuit highlights simpleness. The red writing may be perceived as blood, therefore showing murder and death.

Still from Friday the 13th Denotation
Car Park shot of emptyness, long black coat on man in distance. Woman shot from behind, she is closer to camera.
Connotation
Empty car park creates eerieness, woman closer to camera highlights how she may be the protagonist. Unknown danger of man in the background.

Still from The Exorcist
Denotation
Girl with scabby and rotting face. long red hair and glaring eyes. White laced dress.
Connoatation
White nighty contrasts her red hair. Red hair symbolises danger. White dress highlights innocence and child like nature.

Still from The Ring
Denotation
White room, white dress. Microphone on the floor. Black shoes, and long black greasy hair.
Connotation
Whiteness highlights innocence and in the background surroudings, a clinical environement. e.g. hospital, mental institute. Black hair highlights darkness within a character. Dirtiness of hair also symbolises how she is unkempt.

Still from The Omen
Denotation
Small boy in black suit with a white shirt and black hat. In a graveyard with white crosses.
Connotation
White symbolises good. Black suit contrasts to grave stones. Signifying danger, crosses show religion.

Still from It
Denotation
Man with a painted face, with red hair and sharp teeth.
Connotation
White face symbolises a 'Clown'. Red hair shows danger - contrasting with the white face, when white usually symbolises innocence. Clowns also symbolise fun and happiness which juxtapposes with the sharp teeth. making him look threatening and dangerous.

Still from Halloween
Denotation
Man with a white face, looking over a banister holding a large knife
Connotation
High up shot shows his imprtance and hierachy. Knife= danger.

Still from H20
Denotation
Man with white mask, mask looking through window to woman with her mouth open.
Connotation
Woman is shocked or scared by seeing him. Highlights his danger. Yet she is protected by the steel. Rounded wondow symbolises a submarine. Blue colouring highlights the movie name of H20 which is the chemists name for Water. Also teaching the audience that it may happen underwater.

Moodboard - WHAT SCARES PAULA ?


blood...
churches...
darkness....
syringes...
extreme religion...
apocalypse...
terrorism...
paranormal activities...
freaky children and dolls...
Pan's Labyrinth...
war...
spiders...

Tuesday 12 October 2010

Prelimanary Task Shoot in October - EVALUATION

1. Filming
We finally started to get a little bit creative and apply the theoretical stuff we learned about camera operating...

We were given the storyboards for the short scene we were supposed to shoot in our group of 5 people.

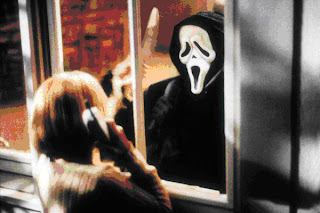
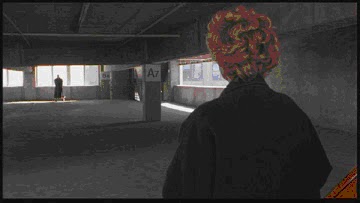
We casted two guys who we found in the Private Studies room and changed the story slightly, adding a mobile phone to it. Our location was the hurtwood film studio where we had a small white corner with two chair, a lamp and a cupboard as props and a door which we implied in the beginning and end of our scene, seeing Character A entering and leaving. This location worked quite well for our scene because it provides a very quiet atymosphere so the tense content of the scene is likely to be emphasized.                                     

We kind of divided the responsibility during filming, so everyone had his own task or job to care about, although everybody was aware of everything that happened. I directed. -ish. This is what I'm most interested in as well. So I rather focused on what actually happened infront of the camera and on the screen than how the scene is framed and camera operations.    

The lighting was a little difficult in the beginning because we had such a bright white room the actors looked a little too dark. But we sorted it out with white-balancing. Because it's just a preliminary task shoot and we only had an hour time to shoot, we didn't care more about creating a nicer looking lighting, otherwise we would have wanted a more moody light that matches the actual mysterious diegesis.


Filming... did we:

- set up camera correctly? Yes, without many problems.
- check the tripod was level (bubbling)? Yes. 
- framed shot correctly each time? Well, we tried, but in sometimes we didn't pay enough attention on it which we regretted because  in one shot we accidently cut off a small part of the actors top head but left space at the bottom of frame. That doesn't look good.
- made sure that lighting equipment and objects that not belong to the scene are not in the shot! YES
- chosing shots and angles: First we shot the wide and two shots, then the over the shoulder and close-ups. In the end we we filmed character A's entrance and leaving, establishing the closing door.
180-degree-rule: due to the wall infront of which we situated the two actors on the chairs prevented us from making the 180-degree-rule mistake (without actually knowing...).                                                                                  
- use of appropriate language and terminology: We did make use of this and since I was pretty much the director I shouted out: Stand-by! ... Action! ... Cut!

What I learned from this experience is more the technical aspects as setting up tripods and operating camera with everything that related to it. How approaching to film a scene (starting with what shot, terminology etc.) was quite familiar to me already.
It was fun though and I hope this is what the media course will exists of a bit more in proximate future.
                                                                    
2. Editing
                                                                                                                                                                                                                                                                                                                                                                                                                                                                                                                                                                                                                                                                                                                                                                                                                                                                                                                                                                                                                                                                                                                                                                                                                                                                                                                              
We're now infront of the computer again. We upload our footage onto Final Cut. At first, the best shots are sorted out in a Log Bin we created in the programme. The Log Bin provides an organised overview and makes access to the best clips easier; it's located in the Browser which is to be seen in this Final Cut screenshot:
  

 The best fitting clips for our scene were quite easy to find. We often only had two takes of one shot and then we chose the one where the camera operation was used more efficient or where the 'actors' did a better job. Sometimes a mistake in terms of wrong lines etc. happened, which was for us of course a reason to use the other take. 
In one shot we liked and wanted to take was background noise, so we turned the volume of that down. 

For the order of our shots, we used establishing and wide shots first, then showing the reaction and therefore facial expressions with Close-Ups. As soon Character A sits down on his chair we show the two together in a two shot. 
I remember the difficulty was to create smooth transitions between cuts. I learned that I have to cut while an object\person moves to prevent weird jump cuts.  It's also important to keep an eye on lighting and colors in the image because differences will disrupt the transition's smoothness.       


This is a professional Final Cut programm key board... It has special keys to abridge the work.


Monday 11 October 2010

Camera Operating

Camera: Sony PD-170

1. Camera operation and functions
First thing to do is setting up the tripod and adjust the bubbling to make the camera steady.
-> The tripod enables the camera (wo)man to do smooth camera shots and movements, such as panning, tracking, tilting and zooming evenly. This is different to handheld camera shots where the shots are shaky and likely to jump. The decision to whether use handehld or steady camera depends on what a scene should communicate, also according to the genre of a movie. Handheld camera shots are often used for Horror or tricky situations in Thriller.
Before starting to record the following has to be settled:
  • Timecode - it's found in the right hand corner of the LCD. It's read from the left, showing hours, minutes, seconds and frames recorded. Every second there are 25 frames, it's the amount of pictures taken per second. This creates the illusion of motion.
  • white-balancing - The camera needs to know what is "white" to ensure that colors are reproduced accurately. Otherwise, your camera thinks white is what it saw under florescent lights when you are shooting in warm sunny summer sunlight and causes light changes every shot. How to do? Show the camera something white e.g. a wall under the light you'll shoot in. It's possible to white balance manually or with an automatically white-balance setting that most of the new cameras have.
  • focussing - the adjustment of the lens so that the image you are video taping is sharp and clear in your view finder or on your monitor. It's important to zoom in on to one spot and focus so it's sharp and then zoom, this enables me to zoom in and out as much as I'd like with a constantly sharp picture.
 Aperture setting\recording speed - We can choose between Standard, Extended and Super Long Play. But we shall only record a video tape with Standard Play! Otherwise there'll be overlapping and the result is a smeared and streaked video that possibly can't be read on a VCR.
The Shutter Speed allows us to speed up or slow down the camera movement.


2. Using the camera

Camera shots are chosen related to how a character or object is framed and represented on screen. Directors use different shots to add atmosphere and create a specific mood in a scene.
  •  Extreme Long Shot/Establishing Shot - usually exteriour shot, establishes time and location, important! Often used at start of a production to provide the audience with information regarding the setting of a storyline. Often followed by...
  • Long Shot - character is in frame from head to toe, allows viewer to understand relationship between characters and their environment.
  • Mid shot - Character is framed from waist up. Viewer can become more familiar with character because body language and facial expressions are shown in more detail.  
  • Two shot - two characters in frame, often used in TV Chat shows
  • Close Up - character's shoulders and head with a little background is in the frame. Enables to focus on character's emotions, can provide significance to the narrative!
  • Point-of-view shot - Is a reference to Close Up. The object or person that is shown is of significance to the charcter we've seen before in the Close-Up shot and he's looking at it at that moment. Used to engange audience with character's motif.
  • Extreme Close Up - draws attention even more on emotions of character. No other action taking place around the shot is seen.
The rule of thirds: The rule states that an image should be imagined as divided into nine equal parts by two equally-spaced horizontal lines and two equally-spaced vertical lines, and that important compositional elements should be placed along these lines or their intersections. Proponents of the technique claim that aligning a subject with these points creates more tension, energy and interest in the composition than simply centering the subject would.
When filming people (or photographing), it is common to line the body up with a vertical line, and having the person's eyes in line with a horizontal one.


Continuity editing
This is the predominant style of editing in narrative cinema and television. The purpose of continuity editing is to smooth over the inherent discontinuity of the editing process and to establish a logical coherence between shots. Basically, to ensure that the selected shots are put together in an order that makes sense to the audience – so that they can follow the story as clearly as possible.
In order to do so, the 180 degree rule plays a crucial part to let as scene look conitnious. The rule prevents the camera from crossing the imaginary line connecting the subjects of the shot, so the characters don't jump away from their positions all of a sudden.


Tuesday 28 September 2010

Photography and Image Manipulation

Composition:
Photography brings a visual language that is universal in understanding. We must then understand its vocabulary which consists of shapes, textures, patterns, lines, colours, shade of light to dark and sharp to blurry images. Just as we must learn to arrange words in a coherent order in order to make sense when we write or speak, so too must we put visual elements together in an organized manner if our photographs are to convey their meaning clearly and vividly.
Composition means arrangement: the orderly putting together of parts to make a unified whole; composition through a personal, intuitive act. However, there are basic principles that govern the way visual elements behave and interact when you combine them inside the four borders of a photograph. Once we have sharpened our vision and grasped these basic ideas of principles, then we will have the potential for making our photographs more exciting and effective than ever before.
What have I learned in my first Photoshop lessons last week?
I understood how to open Photoshop, it's easier than you think!
Besides that, I was taught how to put an image into another picture and adjust it, so it looks as real as possible, trying to give the impression the picture is meant to be like this. (I cut the 50feet woman from the movie's poster and pasted it into the destroyed bit of New York City in the poster of Cloverfield).
This adjusting involves, the cutting with the lasso keeping Alt pressed, then pasting it into the other picture. Next, I can fit the cutout in by changing size, colors etc.:
Edit - Transform... Image - Adjustments... - Hue\Saturations
I can create shadows\reflections through changing the opacity percentage on the right editing window.
I enjoyed working with it and hope I'll be able to do some good work with Photoshop some time.


Following an example what Photoshop is capable of:

Me(dia)

I'm Paula, pleasure to meet you. I'm from Berlin. I love Berlin. I went to a very bad normal public school there and now my wonderful parents decided to send me to Hurtwood, so I at least learn something in the last two years of school.

My family is an art family, my parents are actors, so I grew up in the (mostly german) film industry... Everyone always used to ask me if I want to be like Mommy one time, but I think, when I'll do something with film later it would be behind the camera.

I find film incredibly fascinating though....
I don't have a favorite movie, sorry. But some that left big impressions behind are for example City Of God, thirteen, Romeo + Juliet by Baz Luhrman, Fame, Shutter Island, A single man, ...
And Quentin Tarantino is a director who I very much admire, same with Oskar Roehler.

Thanks for the attention!
I love you all. Ich liebe euch alle.